Excellent clothes product photography isn't just a nice-to-have; it's the single most critical asset for your online store. We're not just taking pictures of clothes here. We're trying to make customers feel the fabric through the screen, truly understand the fit, and see themselves in your apparel. Great images do the heavy lifting—they build trust, justify your price point, and turn browsers into buyers.
Why Your Photos Are Your Most Valuable Asset
In e-commerce, your product photos wear a lot of hats. They're your digital storefront, your virtual fitting room, and your best salesperson, all working 24/7. Since customers can't physically touch the garment or try it on, they are depending entirely on your visuals to click "add to cart." This makes top-notch photography completely non-negotiable for any brand serious about growing online.
The link between professional images and sales is crystal clear. The data is overwhelming: 90% of online shoppers say photo quality is the single most important factor in their decision to buy. This translates to a massive 33% higher conversion rate for products that look professional compared to those with amateur shots. It also hits your bottom line directly, helping to reduce the estimated 22% of returns that happen simply because the item didn't look like it did in the photo. If you want to go deeper on this, there are some great fashion photography insights that really break down the numbers.
The Three Core Shooting Styles
Before you can create images that actually sell, you have to pick a shooting style. This choice should be a reflection of your brand identity, who you're selling to, and of course, your budget. While you can get creative, almost all apparel photography boils down to one of these three fundamental approaches:
Flat Lay Photography: This is where you arrange clothing on a flat surface and shoot from directly overhead. It’s fantastic for showing off patterns, textures, and entire outfits in a clean, graphic way. You see it all over social media and in minimalist lookbooks for a reason.
Mannequin Photography: Using a mannequin gives a realistic sense of a garment's shape and structure without the expense or hassle of hiring a live model. The "ghost mannequin" technique—where the mannequin is edited out later—is incredibly popular for creating a clean, uniform look across an entire product catalog.
On-Model Photography: This is the gold standard for selling a lifestyle and creating an emotional connection. When a customer sees the clothes on a real person, they instantly understand the drape, the movement, and the real-world fit. It closes the gap, helping them imagine wearing it themselves.
Each photography style tells a different story. A crisp flat lay speaks to precision and design. A ghost mannequin emphasizes the product's unique form. And an on-model shot sells an experience. The key is choosing the story that best represents your brand.
This isn't just an aesthetic choice; it's a strategic one. A fast-fashion brand churning out new styles weekly might lean on ghost mannequins for speed and consistency. A luxury label, on the other hand, will almost certainly invest in on-model shoots to build an aspirational world around their products.
Figuring out the pros and cons of each method is your first real step toward building a visual strategy that drives results. To make it easier, here’s a quick breakdown.
Comparing Photography Styles for Apparel
This table gives you a quick-glance comparison of the three primary methods for shooting clothes, helping you decide which approach is the best fit for your brand's specific needs and goals.
| Style | Best For | Pros | Cons |
|---|---|---|---|
| Flat Lay | Social media, outfit grids, detailed patterns, minimalist brands. | Cost-effective, easy to style, great for showing entire outfits. | Lacks 3D shape, can feel impersonal, harder to show fit. |
| Mannequin/Ghost | E-commerce catalogs, brands needing high consistency, technical apparel. | Shows product shape, highly consistent, no model costs. | Can look static, requires significant post-production (for ghost effect). |
| On-Model | Lifestyle brands, luxury apparel, showing fit and movement, building brand identity. | Highest customer connection, shows fit and drape realistically, sells a lifestyle. | Most expensive, requires models and stylists, complex logistics. |
Ultimately, many successful brands use a mix of these styles. They might use ghost mannequin shots for their main product pages, on-model photos for landing pages and marketing campaigns, and flat lays for their Instagram feed. Understanding where each one shines is the foundation of a powerful visual brand.
Your Essential Gear and Lighting Setup
Jumping into professional clothes product photography can feel like a huge commitment, sparking visions of pricey studios and overwhelming gear lists. But here’s the good news: you don't need a Hollywood-sized budget to create images that actually sell your product. It’s all about making smart choices with the essentials, especially your camera, lens, and—most importantly—your lighting.
Think of your camera as the canvas and the lens as your brush. Just about any modern DSLR or mirrorless camera will get the job done, but your choice of lens is where the real magic happens. A versatile 50mm prime lens, affectionately known as a "nifty fifty," is a fantastic place to start for apparel. Its field of view is incredibly close to what the human eye sees, giving you natural-looking proportions without the weird distortion you can get from wider or longer lenses. It's sharp, surprisingly affordable, and forces you to be a bit more thoughtful with your composition.
This workflow chart shows the typical path a photoshoot takes, starting with simple flat lays and building up to the more dynamic on-model shots.
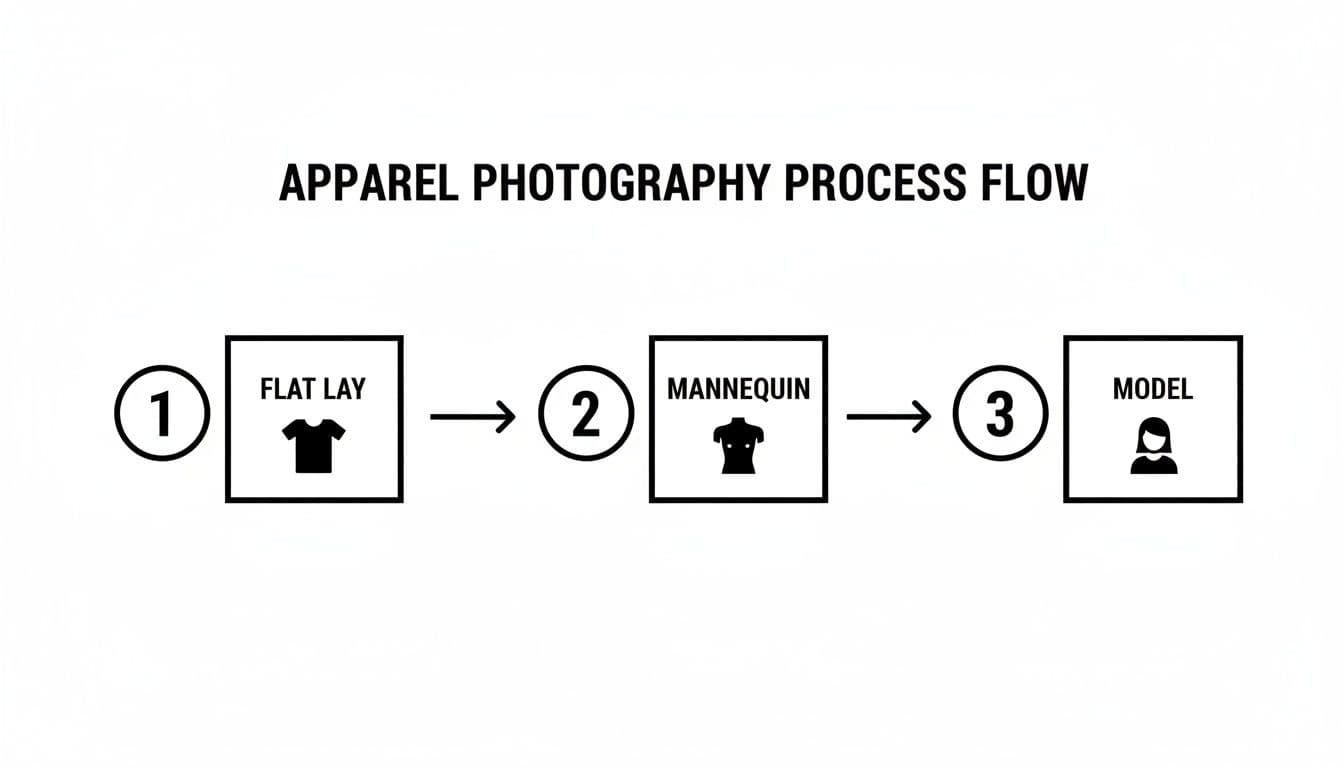
Flowchart illustrating the apparel product photography process, showing flat lay, mannequin, and model stages.
You can see how each step adds another layer of information for the customer. Flat lays are great for showing off patterns and the basic shape, mannequins give it form, and live models provide that crucial context and aspirational feel.
Mastering Light: Natural vs. Studio
Let's be clear: lighting isn't just part of your setup; it is the setup. It sets the mood, defines texture, and has more impact on your final shot than any other single element. You’ve got two main routes to go: natural light or studio light.
Natural light from a big window is free, and it can create a beautiful, soft aesthetic. The big drawback? It’s completely unreliable. It changes depending on the time of day, the weather, even the season. That inconsistency makes it a nightmare if you’re trying to maintain a uniform look across an entire product catalog shot over several days.
Studio lighting—using strobes or continuous LEDs—puts you in the driver's seat. You have total control, allowing you to replicate the exact same lighting conditions for every single product. This is how you get that clean, cohesive, and professional look that builds trust with shoppers. If you're carving out a dedicated space, it's worth exploring different options for an e-commerce photo studio setup to nail that consistency from day one.
Building Your Lighting Kit
You don't need a truckload of gear to get started. In fact, a simple one-light setup can produce stunningly professional results for clothing photography.
The secret to great product photography isn’t owning the most expensive gear; it’s mastering the light you have. A single, well-placed light source with the right modifier will always outperform a dozen poorly-managed ones.
Start with one strobe or LED light and a large modifier, like a softbox or an octabox. A softbox is designed to diffuse the light, which softens shadows and wraps the light gently around the garment. This is exactly what you want for highlighting fabric texture without creating harsh glares or deep, distracting shadows.
Once you’ve got the hang of a single light, you might want to expand to a more advanced setup. A classic and incredibly effective arrangement is three-point lighting:
- Key Light: This is your main, most powerful light. You’ll typically place it at a 45-degree angle to your product to create shape and dimension.
- Fill Light: Placed on the opposite side of the key light, this one is less intense. Its job is to "fill in" the shadows created by the key light, making sure you don't lose important details in the darker parts of the garment.
- Back Light (or Rim Light): This light goes behind the product. It creates a subtle outline that separates the item from the background, making it pop and giving the whole image a polished, three-dimensional feel.
This kind of controlled approach guarantees that every part of the garment is perfectly illuminated—from the overall shape down to the subtle stitching details. You're giving customers all the visual information they need to click "add to cart" with confidence.
Nailing Your Camera Settings and Pre-Shoot Prep
Here’s a secret that will save you countless hours in editing: get it right in the camera. A fantastic final image always starts with a fantastic raw file, and that means taking control of your camera's manual settings. This isn't about getting bogged down in jargon; it's about making conscious choices to capture your clothing exactly how you want it to look.
The first thing to lock down is your aperture, also known as f-stop. For clothing, you need the entire garment to be tack-sharp—from the button closest to the lens to the furthest seam. A blurry, artistic background might look cool, but it hides the very details a customer needs to see to make a purchase.
We’re aiming for an aperture between f/8 and f/11. This range gives you a deep depth of field, ensuring every single part of the product is in crisp, clear focus. In e-commerce, detail sells.
Setting Your Camera for Sharp, Clean Images
Once you've set your aperture, the other two legs of the exposure triangle—shutter speed and ISO—pretty much fall into place. And since you should absolutely be using a tripod for stability and consistency, you don’t need a super-fast shutter speed.
A shutter speed around 1/125th of a second is a solid, reliable starting point. It's more than fast enough to eliminate any camera shake (even from you pressing the shutter button) and it syncs perfectly with most studio strobes.
Finally, set your ISO as low as it can possibly go, which is almost always ISO 100 or 200. Low ISO is the key to clean, professional images that are free from that distracting digital "grain" or noise. You're controlling the light with strobes or continuous LEDs, so there's really no reason to ever push the ISO higher.
Your goal in-camera is to produce a technically perfect file. Set your aperture to f/8-f/11 for sharpness, your shutter to 1/125 for stability, and your ISO to 100 for a clean image. This foundation makes post-production a breeze, not a rescue mission.
The Real Work: Pre-Shoot Preparation
The most dialed-in camera settings on earth can't save a wrinkled shirt or a poorly fitted dress. The truth is, the most important work of a great clothing shoot happens long before you even touch the camera. Preparation is everything.
Every single garment needs to be prepped like it's about to walk the red carpet. That means steaming or ironing every piece until every last crease is gone. Wrinkles are distracting, they look unprofessional, and they send a message that you don’t care about your product.
Your Pre-Shoot Checklist
A well-thought-out shot list is your roadmap for the day. It’s what keeps the shoot on track, ensures you get every angle you need for a compelling product page, and prevents the nightmare of a costly reshoot.
- Steam and Prep: Every item must be perfectly pressed. Have a lint roller on hand.
- Organize by Style: Group similar items together. This streamlines the workflow and minimizes changes to your lighting and camera setup.
- Create the Shot List: Define every required shot for each product before you start. No winging it.
- Gather Styling Tools: Keep clips, pins, tape, and tissue paper within arm's reach to perfect the fit on a model or mannequin.
At a bare minimum, your shot list needs to cover these angles to give a customer the full picture:
- Front View: This is your main hero shot.
- Back View: Shows the fit and any details on the back.
- 45-Degree Angle or Side View: Gives a much better sense of the garment's shape and dimension.
- Detail Shot: Get in close on the fabric texture, a unique button, a zipper, or special stitching.
This level of prep work is what separates the pros from the amateurs. It ensures a smooth, efficient shoot day and lets you focus your energy on creating beautiful images instead of scrambling to fix problems that were entirely preventable.
The Art of Styling and Directing for Impact
Great camera settings will get you a technically perfect photo. But killer styling and direction? That’s what sells the product. This is where your brand’s personality really comes through, turning a simple picture of a t-shirt into something that makes a customer need to have it. It’s all about adding that human element, even when there isn't a person in the shot.
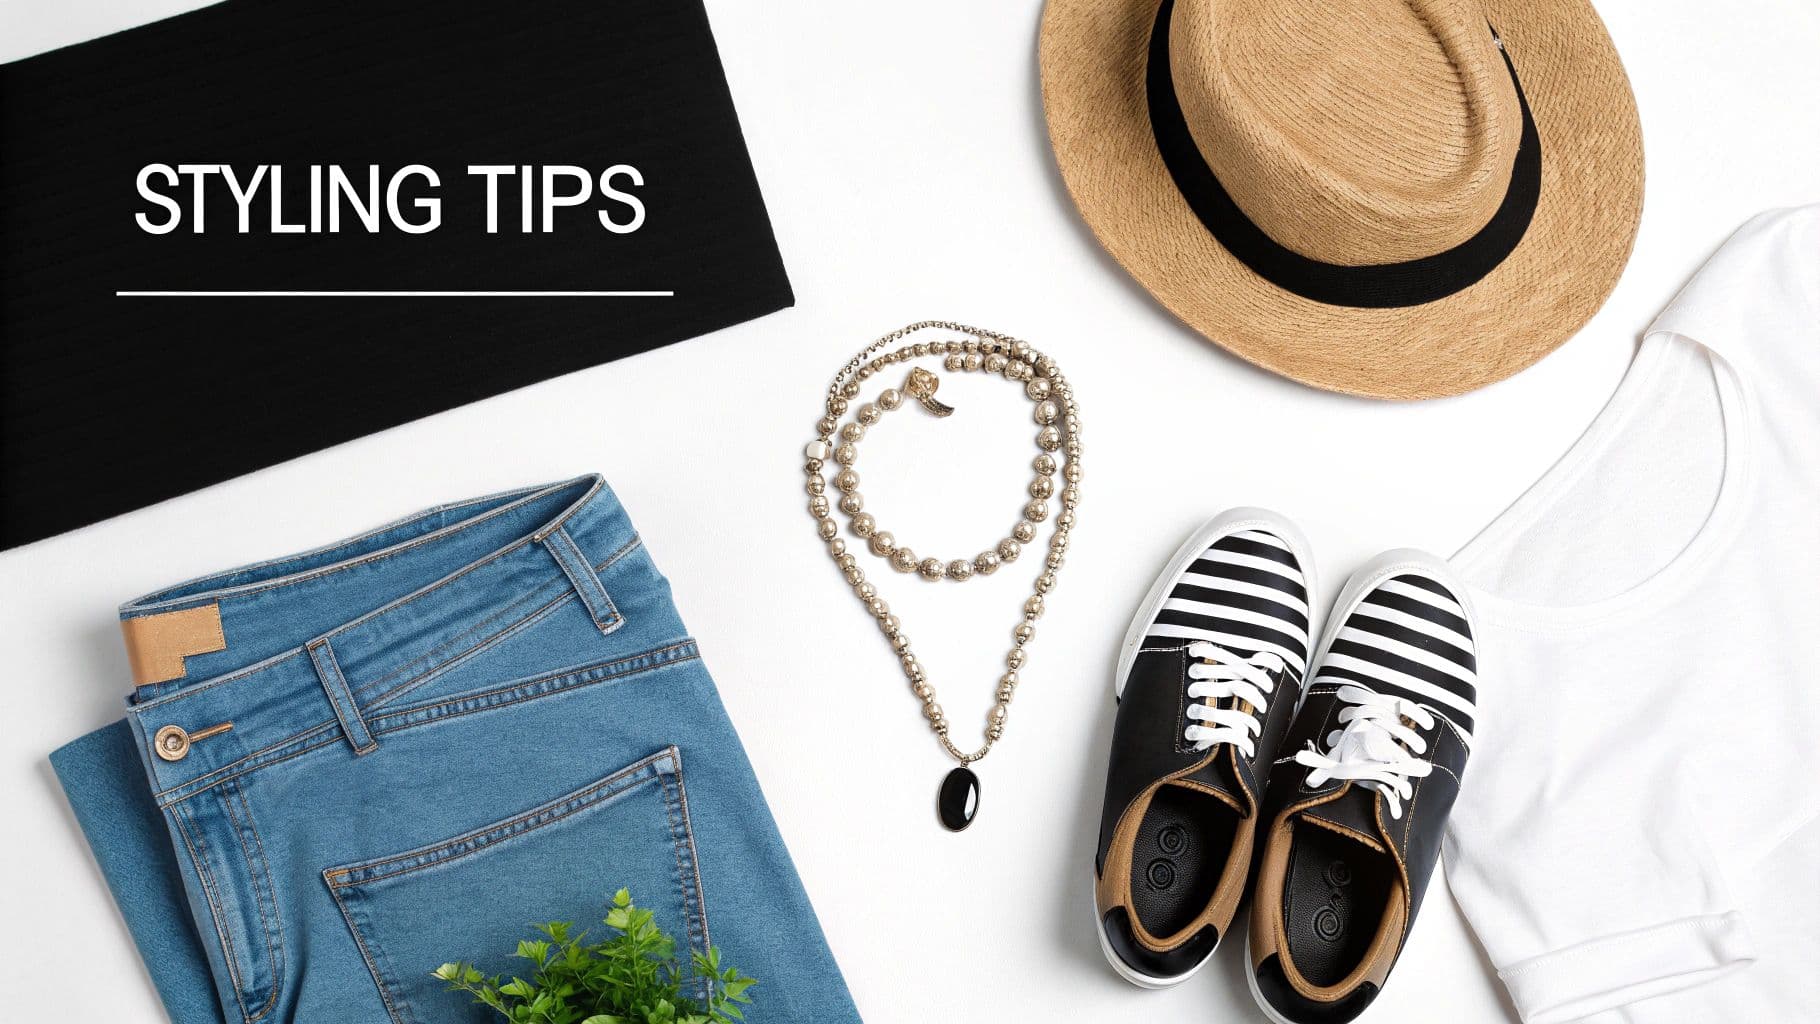
Flat lay of styling tips featuring blue jeans, white t-shirt, straw hat, necklace, and striped shoes on white.
Whether you’re carefully arranging a flat lay or coaching a live model, your real job is to answer the questions shoppers have in their heads: How does it fit? What’s the fabric like? How would I actually wear this? The choices you make here are the answers.
Mastering Flat Lay Composition
A good flat lay looks effortless, but it’s anything but. It’s a careful balancing act of art and salesmanship, designed to guide the eye and tell a quick story.
You can go minimalist, placing just the garment on a clean background. This approach screams quality and puts all the focus on the design details and craftsmanship. It’s a power move for brands built on superior construction.
Or, you can get more creative and build a scene with props. For a summer dress, you might toss in a straw hat, some sunglasses, and a good book. The key is that the props can't steal the show; they’re just there to add context and help the customer build an emotional connection. They help sell a vibe, not just a dress.
Perfecting the Fit on a Mannequin
When you’re shooting on a mannequin, the entire goal is to make the garment look like it’s on a real person—a person with a great figure. A poorly dressed mannequin can make a beautiful piece look baggy and sad. This is about more than just throwing the clothes on the form.
Get in there with clips, pins, and even a bit of tissue paper to cinch the waist, kill any awkward bunching, and make sure the fabric hangs just right. You want the silhouette to look filled out and true to size. If you really want to level up your presentation, learning how to dress a mannequin like a pro is a game-changer. The aim is an idealized, but still believable, representation of the fit.
Great styling isn’t about making the clothes look perfect; it’s about making them look real and desirable. Your job is to bridge the gap between a static object and a dynamic piece of a person’s life.
Directing Models for Authentic Poses
Models bring your clothes to life, but only if you know how to direct them. The key is getting poses that feel genuine, not stiff or contrived. Every bit of direction you give should have one goal: to show off the clothing’s best features.
Before the shoot even starts, pull together a mood board with poses that fit your brand’s vibe. When you’re on set, use action-oriented language. It makes a world of difference.
- Instead of saying "stand there," try "walk toward me slowly."
- Instead of "pose," try "put your hand in your pocket like you're looking for your keys."
- Want to show off the movement of a skirt? Ask the model to give it a gentle twirl.
These small tweaks create real, unscripted moments that feel less like a photoshoot and more like a captured slice of life. That’s the authenticity that helps customers see themselves in your clothes, moving them from just looking at an item to actually imagining themselves wearing it.
Post-Production and Scaling Your Workflow With AI
The click of the shutter isn't the end of the road—it’s just the beginning of the next phase. Post-production is where a good raw image becomes a great, conversion-ready asset. This is your chance to polish every detail of your clothes product photography until it shines.
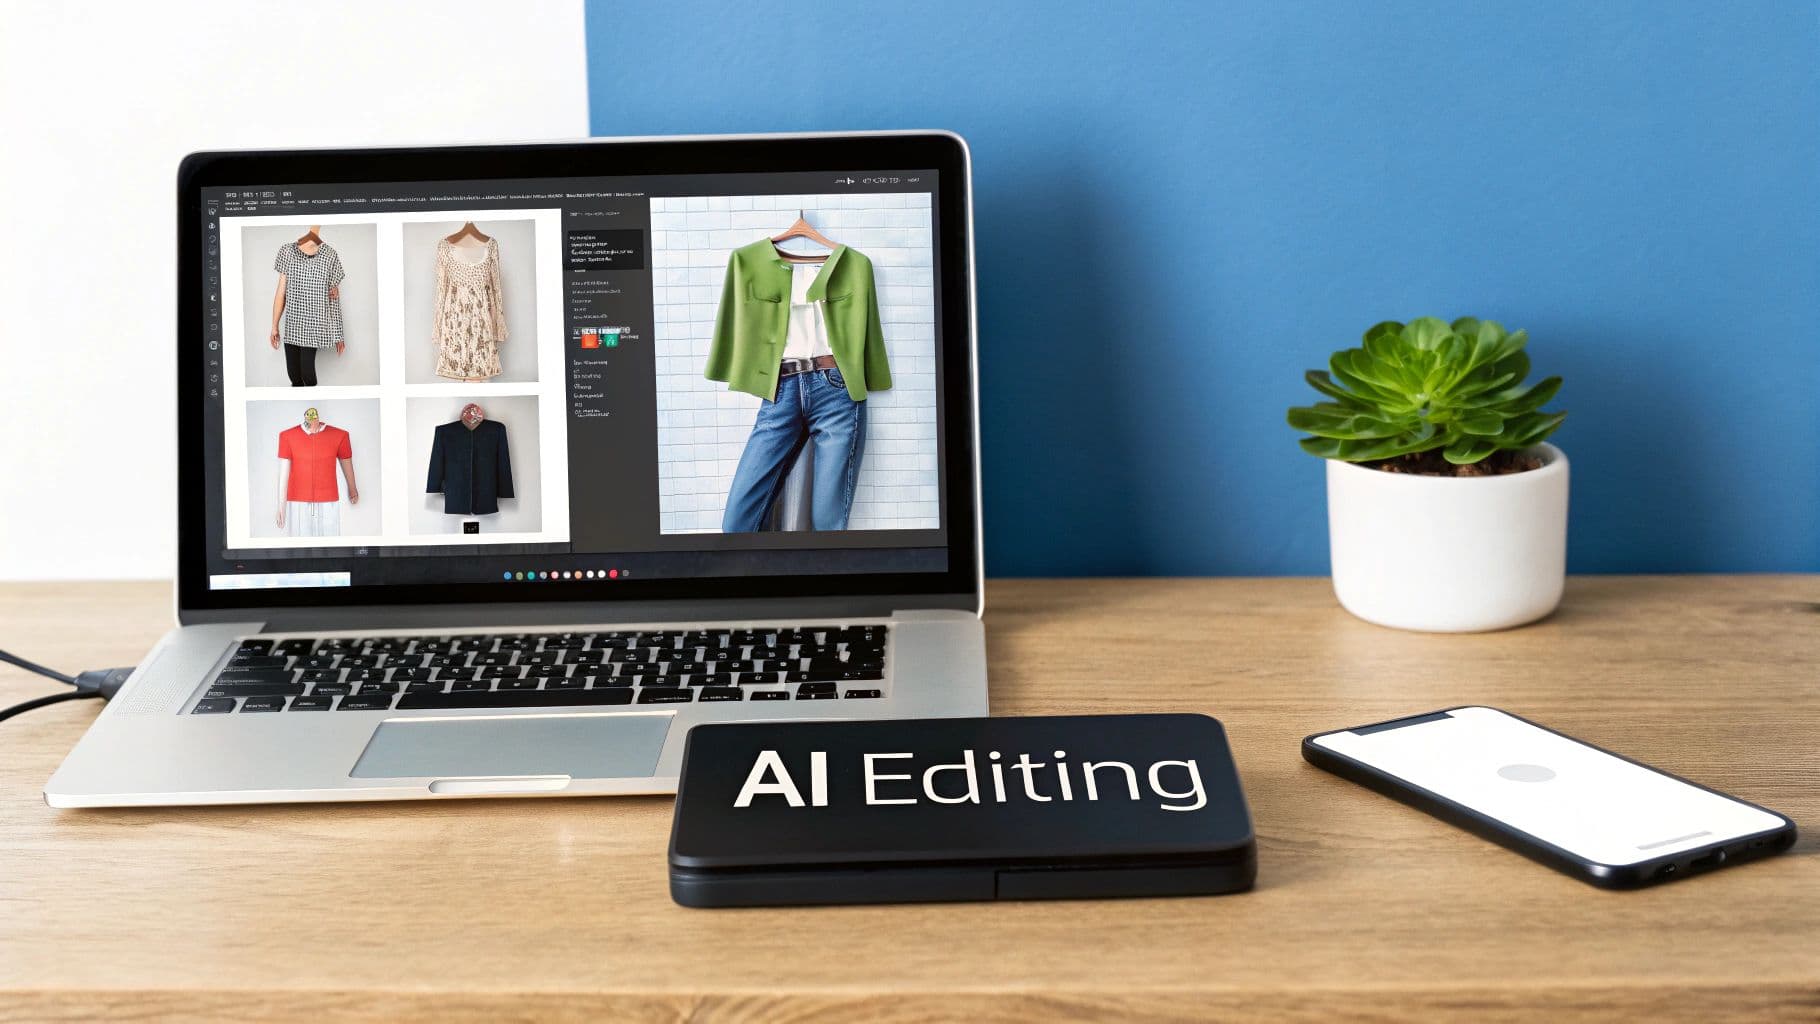
A laptop on a desk displays fashion product photos being edited with an 'AI Editing' device.
A few editing tasks are absolutely non-negotiable for a professional look. It always starts with color correction. You have to make sure the ruby red dress in your photo is the exact same ruby red the customer receives. Then you move to background removal, creating that crisp, clean backdrop that’s the hallmark of any serious e-commerce site. Finally, a little retouching to zap a stray thread or a fleck of dust adds that final layer of polish.
But as your brand grows, this manual, one-by-one editing process turns into a massive bottleneck. Editing hundreds of images by hand is painfully slow and expensive, dragging down your ability to launch new products and keep up with trends.
The Manual Bottleneck and How to Break It
For any growing e-commerce brand, time is literally money. Every hour tied up in post-production is an hour a new product isn't live on your site making sales. This old-school workflow creates a few key problems that can seriously stunt your growth:
- Inconsistency: When different editors—or even the same person on different days—work on your images, tiny inconsistencies in color or brightness can creep in, weakening your brand's visual identity.
- High Costs: Outsourcing to an editing house or hiring in-house retouchers adds up fast. These operational costs scale directly with your product count, eating into your margins.
- Slow Turnaround: The traditional editing pipeline can take days, maybe even a week. In the fast-moving world of fashion, that delay can make a hot new item feel stale before it even hits your store.
The real cost of manual post-production isn't just the editor's hourly rate. It's the lost revenue from delayed product launches and missed opportunities because you can't scale your visual content fast enough.
This is exactly where technology is changing the game. Modern tools don't just automate these tedious tasks; they unlock creative possibilities that used to be out of reach without a Hollywood-sized budget.
Scaling and Enhancing With Artificial Intelligence
The frustrations of the traditional photography workflow have cleared the path for a powerful new approach. AI-powered platforms can now take a simple flat-lay or hanger shot and transform it into a photorealistic, on-model image in seconds. We're not just talking about speeding up editing—we're talking about completely rethinking how you create content.
This isn't just a fleeting trend. The AI-generated fashion photography market is set to explode from $1.51 billion to $6.12 billion by 2029. Brands are jumping on board, reporting up to 90% lower production costs and seeing real improvements in ad performance, all while getting full commercial rights to use the images however they want.
To give you a better sense of how these two workflows stack up, here’s a quick comparison.
Traditional vs. AI-Powered Photography Workflow
| Aspect | Traditional Photography | AI-Powered Photography |
|---|---|---|
| Time-to-Market | Weeks (casting, shooting, editing) | Minutes (upload, generate, download) |
| Cost | High ($1,000-$10,000+ per shoot) | Low (flat monthly fee, often under $50) |
| Flexibility | Low (locked into one model, location) | High (instantly change models, backgrounds) |
| Diversity | Limited by casting availability/budget | Unlimited (any ethnicity, age, body type) |
| Scalability | Difficult and expensive | Effortless and affordable |
| Consistency | Prone to human error | Perfect visual consistency every time |
This table makes it clear: AI doesn't just make the old process faster, it introduces a level of flexibility and efficiency that was previously impossible.
Instead of wrestling with the logistics and costs of a full-blown photoshoot, you can now generate an endless variety of on-model images from a single product photo. The advantages are huge:
- Dramatic Cost Reduction: Say goodbye to fees for models, photographers, stylists, and studio rentals.
- Unmatched Speed: Go from a basic product shot to a campaign-ready image in under a minute, slashing your time-to-market.
- Ultimate Flexibility: Instantly generate images featuring diverse models to better reflect your customer base. You can also swap out backgrounds on the fly for seasonal campaigns or different marketing channels.
For any brand looking to scale, these tools are a true game-changer. You can find more detailed breakdowns of how AI product photography transforms workflows for modern fashion brands. This technology lets you maintain perfect brand consistency while creating a virtually unlimited library of assets for your site, social media, and ads—all without leaving your desk.
Optimizing Images for E-Commerce Performance
A gorgeous photo that takes forever to load is worse than a mediocre one that loads instantly. After all the work of shooting and editing, the final step—optimizing your images—is what actually turns those beautiful shots into sales. This isn't just some technical box-ticking; it directly impacts user experience, SEO, and your conversion rate.
Slow-loading pages are the number one reason people abandon their carts. The name of the game is getting your file sizes as small as possible without trashing the image quality you worked so hard for. When you're exporting for your website, a good target to aim for is a file size under 200 KB.
File Formats and Compression
Your first choice is the file format. For almost all your product photos on a solid background, a JPEG is your best bet. It offers a fantastic balance between quality and small file size. The only time you'll need a PNG is when you require a transparent background, which is crucial for things like lifestyle composites or layering images on different colored backgrounds.
When you're ready to save, look for a "Save for Web" or "Export As" option in your editing software. This usually brings up a preview window where you can play with the compression slider. You'll be amazed at how much you can shrink a file. You can often compress a JPEG to 70-80% quality with virtually no visible difference to the naked eye, but the file size will plummet. If you want to get into the weeds on the technical side and how it affects SEO, this guide on how to optimize images for web is a great resource.
Sizing for Every Platform
Your website is just one home for your photos. Social media, ads, and marketplaces all have their own rules and optimal dimensions. One size absolutely does not fit all, and uploading a massive website image to your Instagram feed is a recipe for a blurry, poorly cropped mess.
A perfectly optimized image respects both the platform's rules and the user's patience. Tailoring aspect ratios and resolutions for each channel is a sign of a professional, customer-focused brand.
To save you some time, here are the most common specs you'll need:
- Website Product Pages: A square (1:1) is the standard here. Sizing them at 2048 x 2048 pixels is a safe bet, as it gives you enough resolution for a crisp zoom feature without being overkill.
- Instagram Feed: Vertical images dominate the screen. A 4:5 aspect ratio (1080 x 1350 pixels) is what you want—it takes up the most real estate and grabs the most attention.
- Pinterest Pins: Think tall. Pinterest is all about the vertical scroll, so a 2:3 aspect ratio (like 1000 x 1500 pixels) is essential to maximize your visibility.
- Ad Formats: These are all over the place. From Facebook carousels to Google Shopping, always double-check the platform’s latest guidelines before you export.
The final piece of the puzzle is consistency across your entire catalog. This means using the same background color, cropping style, and lighting setup for every single item. This creates that clean, polished, and trustworthy look that encourages people to buy. If you’re trying to figure out how to manage this at scale, our guide to e-commerce image editing breaks down some practical workflows. Getting these technical details right isn't just about looking good; it's about making your site faster, improving your SEO, and turning more browsers into buyers.
Got Questions? We've Got Answers
Even with the best plan, you're bound to run into questions on shoot day. Here are a few common ones we hear all the time, along with some practical advice to keep you moving.
What’s the Best Background for Clothing Photos?
For your main e-commerce product listings, a neutral background is non-negotiable. Think pure white (#FFFFFF) or a very light gray (#F0F0F0). This is the industry standard for a reason—it removes all distractions, making your product the undeniable star of the show.
Sticking to a clean background also gives your entire product catalog a cohesive, professional feel. It builds trust and makes your brand look polished. That said, feel free to get creative with colored or lifestyle backdrops for your marketing content, like social media posts or email blasts. The key is context: for the page where customers click "buy," keep it simple and clean.
How Can I Make Clothes Look Good Without a Model?
This is a classic challenge. The goal is to give the garment shape and life so customers can imagine themselves wearing it. Your two best bets are ghost mannequins and well-executed flat lays.
Ghost Mannequin: This is a clever post-production trick. You shoot the item on a special mannequin with removable pieces, then edit out the form itself. The result is a 3D image that shows the garment's true fit and structure, as if an invisible person is wearing it.
Creative Flat Lays: We’re not talking about just throwing a t-shirt on the floor. To make a flat lay pop, you need to give it some dimension. Try stuffing a bit of tissue paper underneath to create gentle volume. Style it with care—add a slight curve to a sleeve or a soft fold to imply movement. These subtle details make a huge difference.
A Quick Tip from Experience: When shooting flat lays, get your camera directly overhead and make sure it’s perfectly parallel to the ground. Any angle will distort the garment's proportions and give your customers a skewed idea of the fit. A tripod with a horizontal arm is your best friend here.
Ready to create stunning, on-model visuals without the cost and hassle of traditional photoshoots? With WearView, you can transform simple garment photos into thousands of studio-quality, AI-generated images in seconds. Generate your first images for free and see how easy it is to scale your content.
Tags:

WearView Team
WearView Content & Research Team
WearView Team is a group of fashion technology specialists focused on AI fashion models, virtual try-on, and AI product photography for e-commerce brands. We publish in-depth guides, case studies, and practical insights to help fashion businesses improve conversion rates and scale faster using AI.